
Wendy’s Chili Recipe
Are you a fan of Wendy’s chili? If so, you’re in the right place! In this comprehensive guide, we’ll dive into a perfect copycat recipe that brings the same hearty flavors right to your kitchen. From a bit of history to detailed cooking methods and serving suggestions, we’ve got it all covered. Whether you prefer using a stove, a slow cooker, or an Instant Pot, we’ve included step-by-step instructions to suit your preference. Let’s get started with the first part, where we explore the origins of Wendy’s chili and its beloved place on the menu.
Introduction and History
Introduction
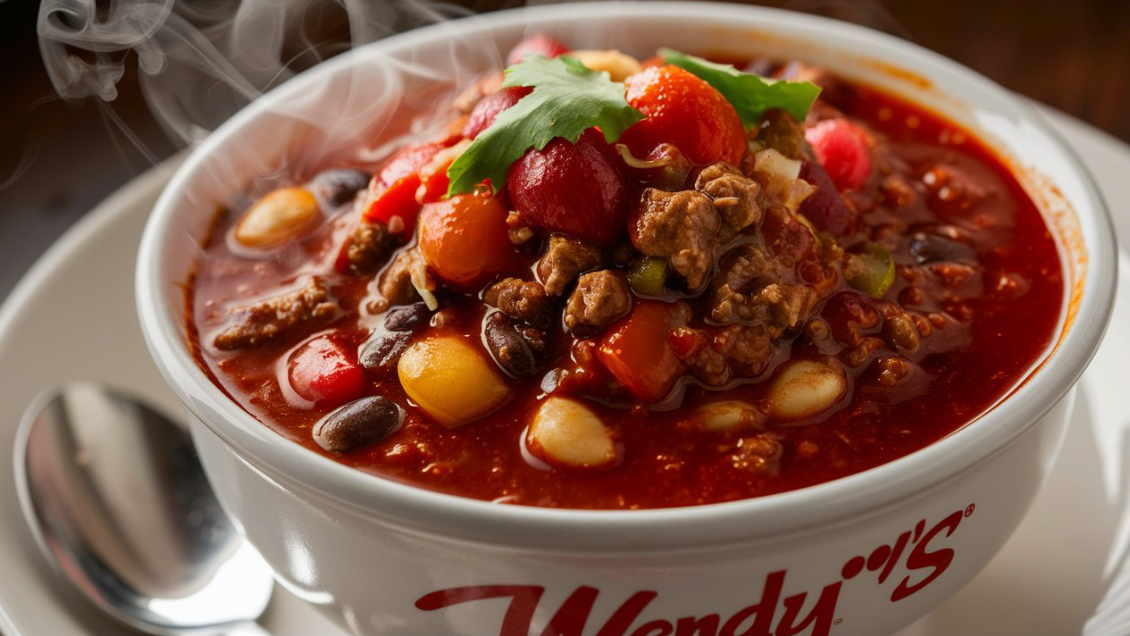
Wendy’s chili has been a staple on their menu for years, loved by many for its rich and hearty flavor. It’s the perfect comfort food, packed with ground beef, beans, and a medley of spices. This article will guide you through making a perfect copycat recipe at home, ensuring you get that authentic taste without leaving your kitchen.
History of Wendy’s Chili Recipe
Wendy’s chili was introduced in 1969 when the first Wendy’s restaurant opened. The founder, Dave Thomas, wanted to offer a wholesome, hearty option that stood out from typical fast-food fare. He envisioned a dish that not only tasted great but also minimized waste by using leftover hamburger meat. Over the years, Wendy’s chili has become a favorite, known for its robust flavor and satisfying texture.
The chili’s recipe has remained relatively unchanged, keeping its classic appeal. It’s a perfect example of how a simple, well-executed dish can become iconic. With its mix of ground beef, kidney beans, pinto beans, tomatoes, and a blend of spices, it’s no wonder this chili has stood the test of time.
Ingredients and Preparation
Ingredients Breakdown
Creating a perfect Wendy’s chili recipe at home starts with gathering all the right ingredients. Here’s what you’ll need:
- 2 lbs ground beef: Opt for 85/15 ground beef for the best balance of flavor and fat.
- 1 large yellow onion, diced: Adds sweetness and depth.
- 1 green bell pepper, diced: Brings a subtle bitterness that balances the sweetness of the tomatoes.
- 1 stalk celery, diced: Provides an earthy undertone.
- 1 jalapeño, diced and de-seeded: Adds a bit of heat.
- 3 cans (14.5 oz each) diced tomatoes, undrained: The base of the chili, giving it a rich tomato flavor.
- 1 can (15 oz) tomato sauce: Adds thickness and a concentrated tomato flavor.
- 1 can (15 oz) kidney beans, undrained: Classic bean choice for chili.
- 1 can (15 oz) pinto beans, undrained: Adds creaminess and body.
- 2 cups water: Adjust to your preferred consistency.
- 1 tablespoon cumin powder: Essential for that warm, earthy flavor.
- 1/4 cup chili powder: The star spice, providing the primary flavor profile.
- 1 teaspoon black pepper: Enhances the other spices.
- 2 teaspoons salt: To taste.
- 1 tablespoon butter: Adds a touch of richness.
Ingredient Substitutions
If you need to adjust the ingredients for dietary reasons or personal preference, here are some great substitutions:
- Ground Turkey: For a leaner option, substitute ground turkey for the beef.
- Red Bell Pepper: If you prefer a sweeter pepper, use red bell pepper instead of green.
- Black Beans: Substitute one can of beans with black beans for a different flavor and texture.
- Vegetable Broth: Use vegetable broth instead of water for added depth.
Preparation Steps
Now that you have all your ingredients ready, let’s get cooking:
- Brown the Beef: In a large pot, cook the ground beef over medium heat until it’s browned and fully cooked. While the beef is cooking, use a spoon or spatula to break it into smaller pieces. This ensures even cooking and a better texture. Once done, drain the excess fat.
- Sauté Vegetables: Add the diced onion, green bell pepper, celery, and jalapeño to the pot. Cook the vegetables, stirring occasionally, until they become tender, which should take about 5 to 7 minutes.
- Add Tomatoes and Beans: Pour in the diced tomatoes, tomato sauce, kidney beans, and pinto beans. Stir everything together.
- Spice it Up: Add the water, cumin, chili powder, black pepper, and salt. Stir well to combine.
- Simmer: Bring the mixture to a boil, then reduce the heat to low. Let it simmer uncovered for 1-2 hours, stirring occasionally to prevent sticking. This allows the flavors to meld beautifully.
- Finish with Butter: Just before serving, stir in the butter until melted. This step adds a rich, velvety finish to your chili.
And there you have it! Your very own homemade Wendy’s chili, ready to enjoy.
In the next part, we’ll explore different cooking methods, including stove top, slow cooker, and Instant Pot variations. Stay tuned for more tips and tricks to perfect your chili game!
Cooking Methods
Stove Top Method
Cooking Wendy’s chili on the stove top is the most traditional method, allowing for careful monitoring and adjustment of flavors.
- Brown the Beef: In a large stockpot, brown the ground beef over medium heat. Once browned, drain the excess fat.
- Sauté the Veggies: Add diced onion, bell pepper, celery, and jalapeño to the pot. Cook until they soften, about 5-7 minutes.
- Combine Main Ingredients: Add diced tomatoes, tomato sauce, kidney beans, and pinto beans. Stir to mix well.
- Spice it Up: Incorporate cumin, chili powder, black pepper, and salt. Pour in 2 cups of water and stir thoroughly.
- Simmer: Bring the chili to a boil, then reduce the heat and let it simmer uncovered for 1-2 hours. Stir the mixture occasionally to prevent it from sticking and to ensure it cooks evenly.
- Add Butter: Stir in 1 tablespoon of butter just before serving to add a rich, smooth finish.
This method lets the flavors meld together beautifully, producing a hearty, comforting chili.
Slow Cooker Method
For a more hands-off approach, using a slow cooker is ideal. This method allows the chili to develop deep, robust flavors with minimal effort.
- Brown the Beef: In a skillet, brown the ground beef over medium heat. Drain the fat and transfer the beef to the slow cooker.
- Combine Ingredients: Add the diced onion, bell pepper, celery, jalapeño, diced tomatoes, tomato sauce, kidney beans, pinto beans, cumin, chili powder, black pepper, salt, and 2 cups of water to the slow cooker. Stir to combine.
- Cook Low and Slow: Cover and cook on low for 4-6 hours or on high for 2-3 hours. Stir occasionally if possible.
- Finish with Butter: Stir in the butter just before serving to enhance the flavor and texture.
The slow cooker method is perfect for busy days, providing a delicious meal with minimal active cooking time.
Instant Pot Method
The Instant Pot method is the quickest way to enjoy Wendy’s chili, offering the convenience of pressure cooking.
- Sauté Mode: Set the Instant Pot to sauté mode. Brown the ground beef until fully cooked, then drain the fat.
- Add Veggies: Add diced onion, bell pepper, celery, and jalapeño to the pot. Cook until softened, about 5 minutes.
- Combine Ingredients: Add diced tomatoes, tomato sauce, kidney beans, pinto beans, cumin, chili powder, black pepper, salt, and 1 cup of water. Stir well.
- Pressure Cook: Secure the lid and set the Instant Pot to pressure cook on high for 20 minutes. Allow for a natural pressure release for about 10 minutes before manually releasing the remaining pressure.
- Finish with Butter: Stir in the butter after pressure is released and the lid is removed.
The Instant Pot method delivers all the deliciousness of Wendy’s chili in a fraction of the time, making it perfect for busy weeknights.
In the next part, we’ll look into various serving suggestions and how to store and reheat your chili. This ensures you can enjoy your homemade Wendy’s chili at its best, even as leftovers.
Serving Suggestions and Storage
Serving Suggestions
Wendy’s chili is incredibly versatile, making it a great base for various meal ideas. Here are some delicious ways to serve your homemade Wendy’s chili:
- Classic with Crackers: Serve the chili in a bowl with a side of saltine crackers or tortilla chips for a crunchy complement.
- Over Rice: Spoon the chili over a bed of white or brown rice for a hearty, filling meal (Insanely Good Recipes).
- Chili Cheese Fries: Pour the chili over a plate of crispy french fries and top with shredded cheddar cheese for a decadent treat.
- Baked Potato: Top a baked potato with chili, shredded cheese, sour cream, and chives for a comforting and satisfying dish (Eating on a Dime).
- Cornbread: Pair your chili with a slice of homemade cornbread or cornbread muffins for a classic Southern touch (Lil’ Luna).
- Chili Dogs: Spoon the chili over hot dogs in buns, sprinkle with cheese and onions, and enjoy a classic chili dog (I Heart Naptime).
- In a Bread Bowl: Serve the chili in a hollowed-out bread bowl for an extra special presentation and added flavor as the bread soaks up the chili (I Heart Naptime).
These serving suggestions not only enhance the chili experience but also provide a variety of ways to enjoy this versatile dish.
Storing and Reheating
Proper storage and reheating are crucial to maintaining the deliciousness of your homemade Wendy’s chili.
- Refrigeration: Once the chili has cooled to room temperature, transfer it to an airtight container. It will keep in the refrigerator for 3-4 days (Insanely Good Recipes) (Lil’ Luna).
- Freezing: For longer storage, portion the chili into freezer-safe containers or freezer bags, leaving some space at the top for expansion. It can be frozen for up to 3 months (Insanely Good Recipes) (Lil’ Luna). Don’t forget to label the containers with the date for easy tracking.
- Reheating:
- Stovetop: For the best results, reheat the chili slowly on the stove over medium-low heat, stirring occasionally until thoroughly heated.
- Microwave: If you’re in a hurry, the microwave is a convenient option. Place a serving of chili in a microwave-safe bowl, cover it loosely, and heat in 1-minute intervals, stirring in between, until hot.
- Oven: If you have a large batch, you can also reheat it in the oven. Preheat your oven to 350°F (175°C), place the chili in an oven-safe dish, cover with foil, and heat for about 20-30 minutes or until heated through.
By following these storage and reheating tips, you can enjoy the rich, hearty flavors of Wendy’s chili even on busy days.
Next, we’ll dive into the nutritional information and ways to customize your chili to suit your taste and dietary needs.
Nutritional Information and Customizations
Nutritional Breakdown
Understanding the nutritional content of your homemade Wendy’s chili is important for maintaining a balanced diet. Here’s a breakdown based on a typical serving:
- Calories: Approximately 250-300 calories per serving, depending on ingredient variations (CopyKat Recipes) (The Girl on Bloor).
- Protein: 15-20 grams, primarily from the ground beef and beans (Dinner, then Dessert).
- Carbohydrates: 20-25 grams, from the beans and tomatoes (The Girl on Bloor).
- Fat: 10-15 grams, influenced by the fat content of the ground beef and the added butter (CopyKat Recipes).
- Fiber: 6-8 grams, thanks to the beans and vegetables (CopyKat Recipes) (The Girl on Bloor).
- Sodium: 800-1000 milligrams, depending on the salt added and the sodium content in canned ingredients (Dinner, then Dessert).
These values provide a good mix of macronutrients, making the chili a hearty and satisfying meal option. Adjusting the ingredients slightly can tailor the nutritional content to better fit your dietary needs.
Customizing the Chili
Customizing your Wendy’s chili copycat recipe allows you to experiment with flavors and adapt the dish to suit various dietary preferences or restrictions. Here are some ideas:
- Make it Spicier: Increase the amount of chili powder, add cayenne pepper, or include diced jalapeños with seeds for extra heat (Lil’ Luna).
- Milder Version: Reduce the chili powder and jalapeños, or omit them entirely. Adding a touch of honey or brown sugar can also balance out the heat (Lil’ Luna).
- Vegetarian Option: Replace the ground beef with a plant-based meat substitute or extra beans. Using vegetable broth instead of water can also enhance the flavor (Dinner, then Dessert).
- Lower Sodium: Use low-sodium canned beans and tomatoes, and reduce the added salt. This is great for those watching their sodium intake (The Girl on Bloor).
- More Vegetables: Add more diced vegetables like carrots, zucchini, or corn to boost the fiber and nutrient content (Dinner, then Dessert) (The Girl on Bloor).
- Different Beans: Experiment with different types of beans, such as black beans or garbanzo beans, to vary the texture and taste (Lil’ Luna).
- Rich and Creamy: Stir in a dollop of sour cream or Greek yogurt just before serving to add creaminess and a tangy flavor (Lil’ Luna).
Customizing your chili not only keeps the dish interesting but also ensures it meets your nutritional needs and flavor preferences.
Next, we’ll look at how this copycat chili stacks up against the original Wendy’s chili and share some reviews and testimonials from those who’ve tried it.
Comparisons and Reviews
Comparing to the Original
When comparing your homemade Wendy’s chili to the original, there are a few key factors to consider: taste, texture, and authenticity.
- Taste: Many people find that the copycat recipe captures the rich, savory flavor of Wendy’s chili very closely. The combination of ground beef, beans, and spices creates a robust and hearty taste that’s hard to distinguish from the original.
- Texture: Wendy’s chili is known for its perfect balance of chunky ingredients and smooth tomato base. The copycat recipe achieves this by using a blend of diced tomatoes, tomato sauce, and undrained beans, which mimic the texture of the original dish.
- Authenticity: The use of common kitchen spices and accessible ingredients makes it easy to replicate the iconic flavor of Wendy’s chili at home. While slight variations in ingredient quality and cooking methods can lead to minor differences, the overall experience remains very authentic.
Many home cooks report that their family members and guests often can’t tell the difference between the homemade version and the chili from Wendy’s, highlighting the success of the recipe in replicating the fast-food favorite.
Reader Reviews and Testimonials
Feedback from readers who have tried the Wendy’s chili copycat recipe is overwhelmingly positive. Here are some highlights:
- Family Favorite: “This chili has become a staple in our household. It’s easy to make and tastes just like the one we love from Wendy’s!” – Sarah, via Insanely Good Recipes (Insanely Good Recipes).
- Perfect for Meal Prep: “I like to make a double batch and freeze it in individual portions. It reheats wonderfully and makes for quick, convenient lunches throughout the week.” – Tom, via Eating on a Dime (Eating on a Dime).
- Delicious and Simple: “I was pleasantly surprised by how easy this recipe is to make. The flavors are spot on, and my kids absolutely love it.” – Emily, via Lil’ Luna (Lil’ Luna).
- Great for Parties: “I prepared this for a game day party, and it was an absolute hit! Everyone asked for the recipe, and no one believed it was homemade.” – Jake, via CopyKat Recipes (CopyKat Recipes).
These testimonials underscore the reliability and crowd-pleasing nature of the copycat recipe, making it a go-to for both everyday meals and special occasions.
Next, we’ll answer some frequently asked questions about Wendy’s chili, helping you troubleshoot and perfect your homemade version.
FAQs About Wendy’s Chili Recipe
Frequently Asked Questions
-
Is Wendy’s chili healthy?
- Wendy’s chili is relatively healthy for a fast food option, with a good balance of protein, fiber, and essential nutrients. However, it is also high in sodium. By making it at home, you can control the ingredients and reduce the sodium content, making it even healthier (Lil’ Luna) (I Heart Naptime).
-
How do I make Wendy’s chili less spicy?
- To reduce the spiciness of the chili, you can cut back on the amount of chili powder and omit the jalapeño. If it’s still too spicy, adding a bit of brown sugar or honey can help balance the heat. Additionally, serving the chili with a dollop of sour cream or plain yogurt can cool down the overall spiciness (Lil’ Luna).
-
Can I freeze Wendy’s chili?
- Yes, Wendy’s chili freezes very well. Let the chili cool completely before transferring it to freezer-safe containers. It will keep in the freezer for up to 3 months. To reheat, thaw the chili in the refrigerator overnight and then warm it up on the stove or in the microwave (Insanely Good Recipes) (I Heart Naptime).
-
What can I serve with Wendy’s chili?
- Wendy’s chili pairs wonderfully with various sides and toppings. Some popular options include:
- Cornbread or Cornbread Muffins: These add a sweet contrast to the savory chili.
- Grilled Cheese: A gooey grilled cheese sandwich is perfect for dipping.
- Baked Potatoes: Top baked potatoes with chili for a hearty meal.
- Rice: Serve the chili over white or brown rice for added bulk.
- Nachos: Use chili as a topping for nachos, along with cheese, sour cream, and jalapeños (Insanely Good Recipes) (Eating on a Dime) (Lil’ Luna).
- Wendy’s chili pairs wonderfully with various sides and toppings. Some popular options include:
-
What are the ingredients in Wendy’s chili?
- Wendy’s chili includes a blend of ingredients that give it its signature flavor. The main ingredients are ground beef, onions, celery, green bell pepper, jalapeño, diced tomatoes, tomato sauce, kidney beans, pinto beans, water, cumin, chili powder, black pepper, and salt (Insanely Good Recipes) (Dinner, then Dessert) (CopyKat Recipes). These ingredients combine to create a rich, hearty chili that’s loved by many.
Conclusion
Final Thoughts
Creating your own Wendy’s chili recipe at home is not only rewarding but also allows you to enjoy this beloved dish with more control over the ingredients and nutritional content. Whether you follow the traditional stove top method, use a slow cooker for convenience, or opt for the speed of an Instant Pot, this recipe is sure to become a favorite in your household.
By exploring different serving suggestions, customizing the ingredients to suit your taste, and understanding how to store and reheat your chili, you can make the most of this versatile dish. The overwhelmingly positive reviews and testimonials from those who have tried the recipe at home underscore its authenticity and deliciousness.
So, gather your ingredients, follow the steps, and enjoy a bowl of hearty, comforting chili that rivals the original from Wendy’s. Happy cooking!